How to Canva?
- ejorigin

- Oct 24, 2024
- 9 min read
Updated: Jul 27, 2025
Written and designed by: Lim Sher Min (23-E1)
Firstly, what is Canva? Canva is an online template editor app for creating social media graphics or presentations, and is used by many students, including myself! Canva is a great platform for digital design work, as the app has a wide range of features, as well as a repository of templates for you to use directly, or draw inspiration from. Best of all, Canva is free and beginner-friendly, which makes it the perfect platform for students to use. Here are 10 Canva features you might find helpful in designing your next poster, presentation or Instagram post!
1. Canva for Education
Did you know that as long as you have a school email account, you have access to Canva for Education? Canva for Education has all the premium features only accessible to Canva Pro users and more! This includes special access to more templates, graphics, brand kits and functions such as the background eraser and magic expand tool.
Here’s how you can sign up for Canva for Education for free with your school email.
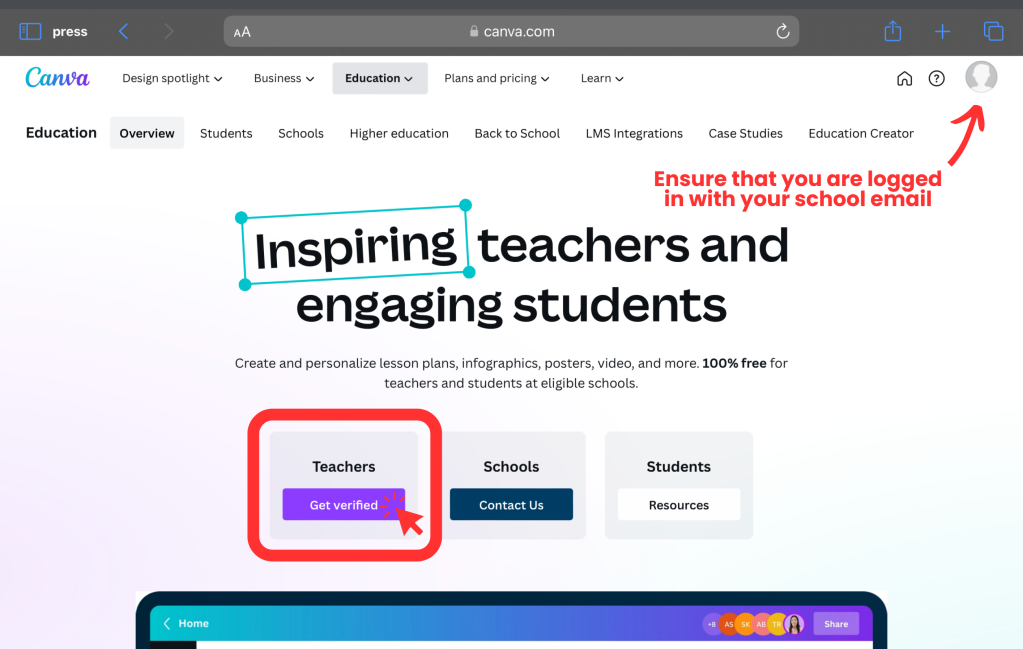
Step 1: On your browser, search for “Canva for Education”, or click this link https://www.canva.com/education/. Do note that this webpage is different from the default Canva log-in webpage. Then, click on “Get verified” under the Teachers option. (Yes, even if you are a student) By signing up as a teacher, you will be able to create your own class instead of having to join someone else’s class.
If you find that the pictures below do not match what you see on your screen, try checking if you are logged into your school email account. Should you have a pre-existing Canva account with your personal email, temporarily log out of that account, and access the Canva for Education webpage again.
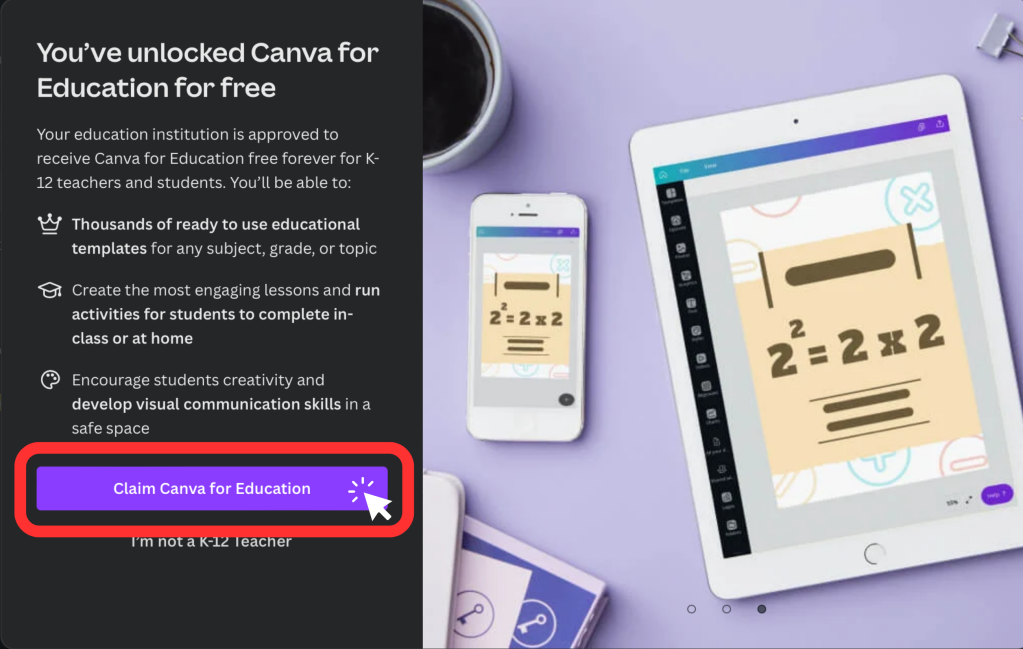
Step 2: You should see this pop-up, click on the “Claim Canva for Education” button. Alternatively, you might see a “Get Started” purple button instead, so click on that instead.
Step 3: You may be brought to this pop-up afterwards, just click on “No thanks, claim Canva for Education”. If you do not see this pop-up, you may ignore this step and proceed to Step 4.

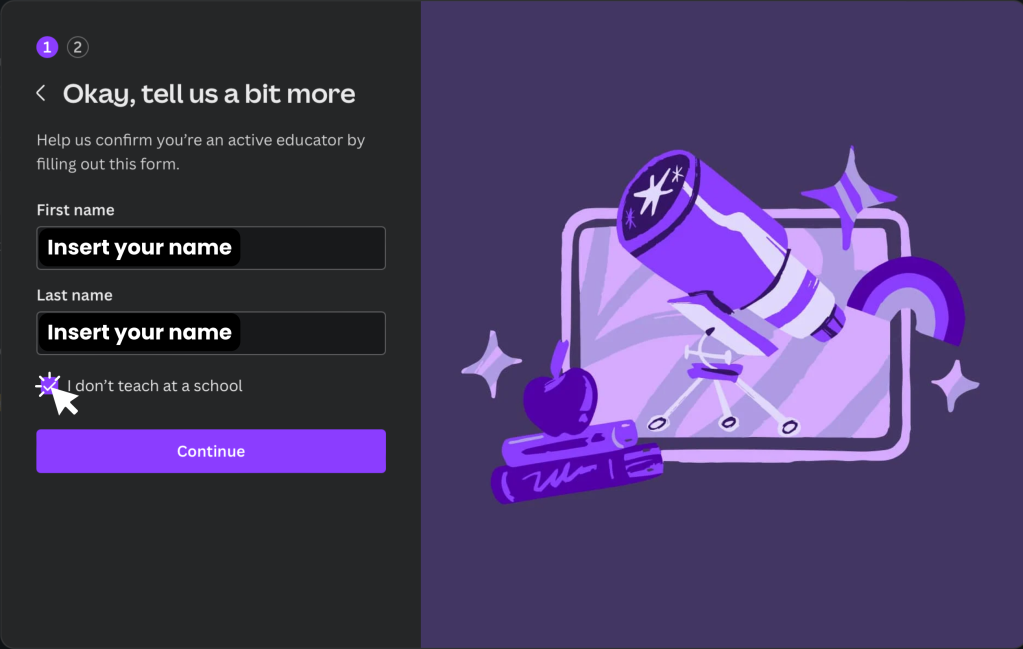
Step 4: Fill in your name and select the option “I don’t teach at a school” to bypass the verification steps which would require documentation of your teaching qualification. Then, click on “Continue”.
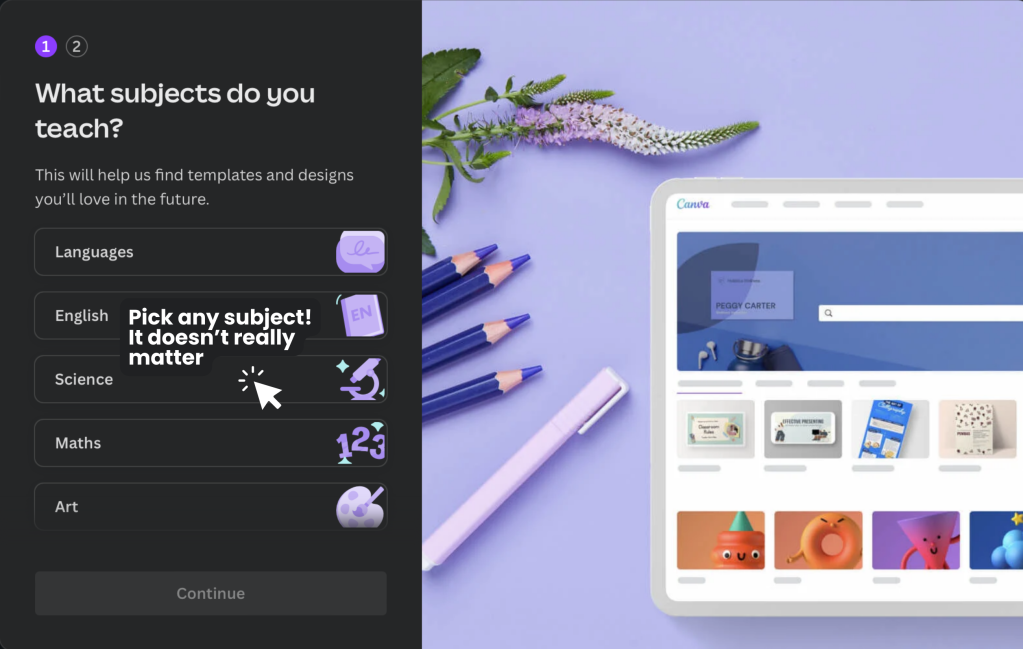
Step 5: Now, you should see two pages that ask for the subject(s) and grades you teach. For both questions, just select any option as it does not affect the sign up process. Click “Continue” after you have answered the questions on each page.
If you have selected “I don’t teach at a school” but are still asked to submit documentation for verification, it could be because you are still logged into a pre-existing Canva account which is under your personal account. Log out of that Canva account before retrying.
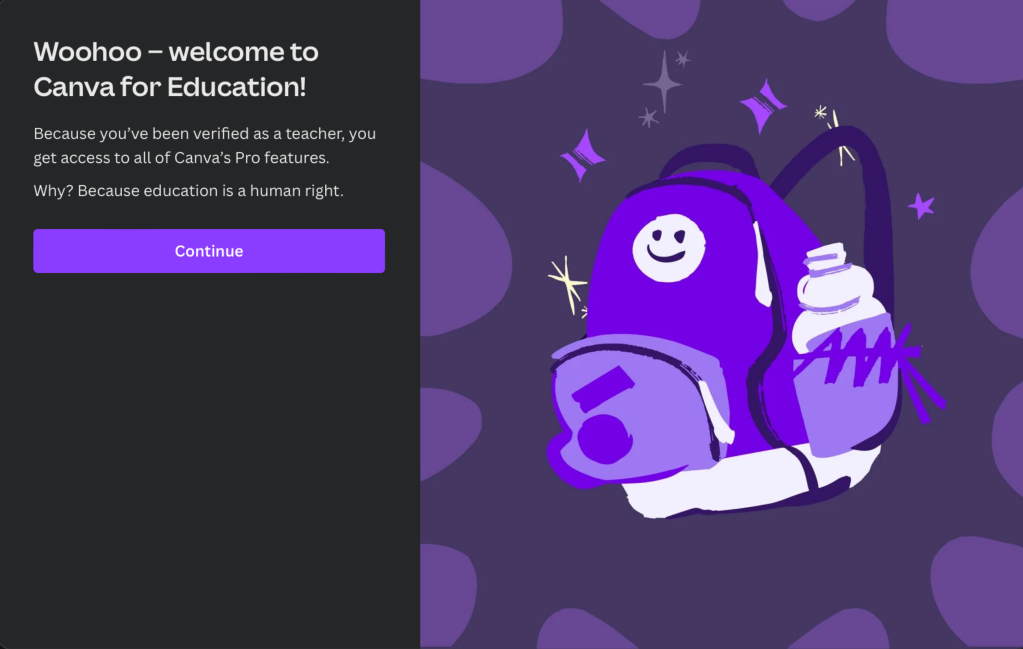
Step 6: Congratulations! You have successfully signed up for Canva for Education.
After this page, you may see a few more pop-ups asking to invite students to a class, but you can ignore it by clicking on the option “I am using Canva for Personal use”. You can always invite your friends to join your “class” afterwards if you wish.
A brief introduction
If you’re unfamiliar with Canva, here’s a brief introduction of Canva’s layout, and where you can find certain features or functions which might be helpful for students.
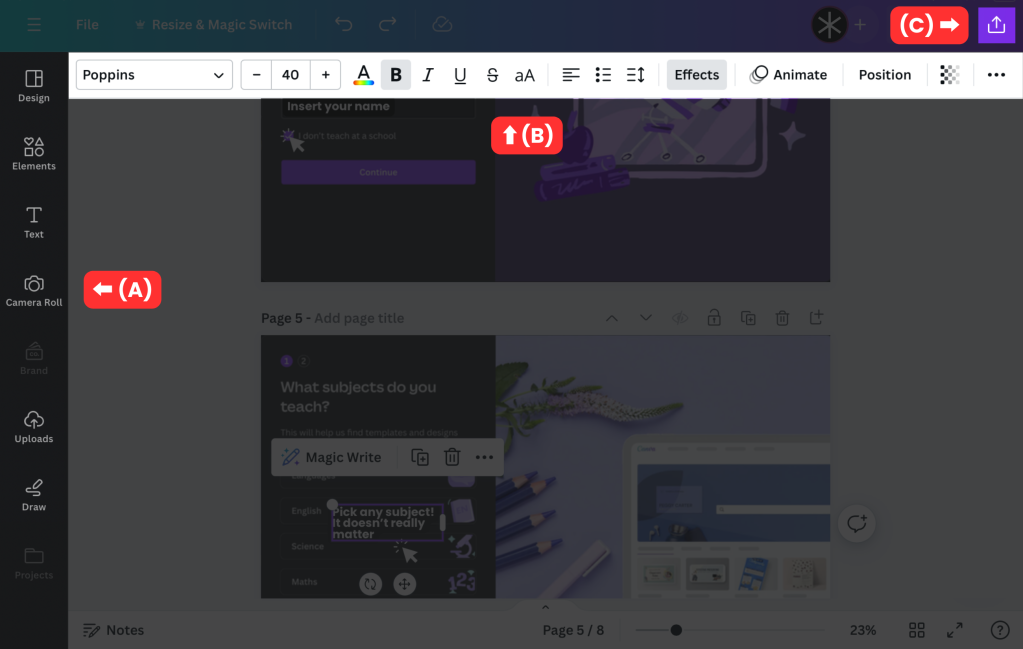
The toolbar on the left of your screen (A) is where you can find the basic features of Canva. Here’s what you can find under each tab:
Design: Templates and Styles
Elements: Shapes, Graphics, Stickers, Photos, Videos, Audio, Charts, Frames and Grids
Text: “Add a text box” and Brand kit (a standardised set of fonts and colour palettes etc that you can access across all your Canva files, usually used by brands or businesses)
Camera roll: Where you can insert images or videos from your device
Uploads: Where you can find all the past images, videos or audio you have uploaded onto Canva
Draw: Where you can draw directly on your canvas
When you click on any element on your canvas, you should see a toolbar at the top of your screen (B). This is where you can find features specific to the element you have clicked on. For example, if you clicked on a text box, you can find the options to change its colour, size and font in this toolbar.
The blue-purple gradient at the topmost of your screen is where you can find the options to resize your canvas, undo actions and share your design. The share icon (C) at the far right would allow you to share your design with other Canva users, present your presentation or download pages of your design.
2. Importing your own fonts
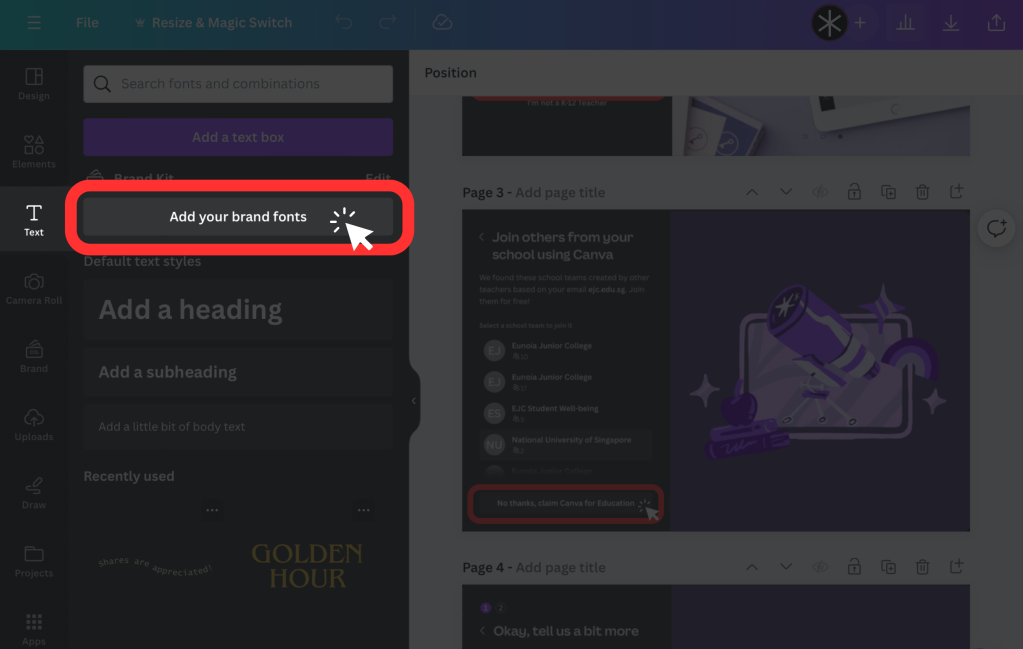
With Canva for Education, you’re no longer limited to the default fonts on Canva. While importing your own fonts is not necessary, it may be helpful if you can’t seem to find the font you want on Canva. Simply open the “Text” tab on the left toolbar and click “Add your brand fonts”.
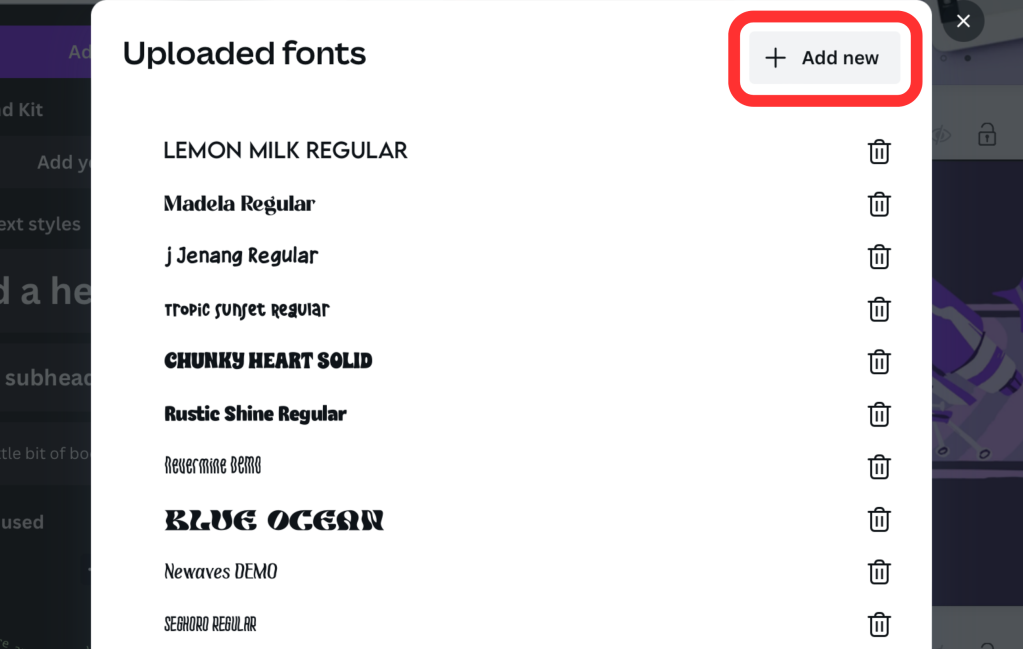
After opening your Brand Kit, click on “+ Add New” beside Fonts, and select “Upload a font".
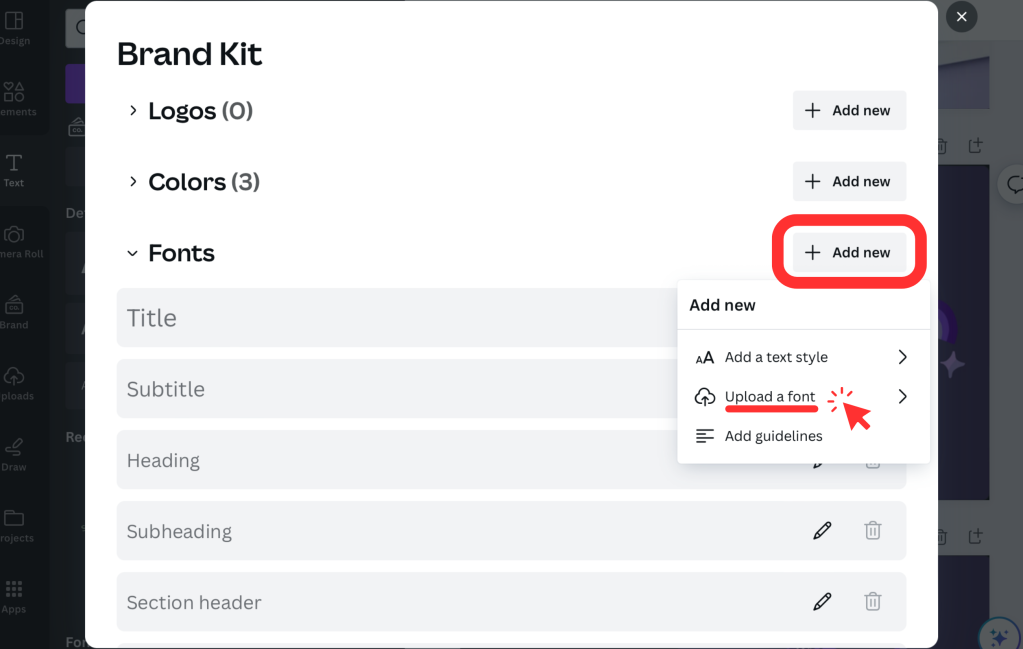
Here, you should be able to see all the fonts you have uploaded before, and upload new ones by clicking “+ Add New”. Upload the font files you have saved and start using them in Canva!
I recommend browsing FontSpace https://www.fontspace.com/ or Dafont https://www.dafont.com/ for fonts!
3. Text spacing and effects
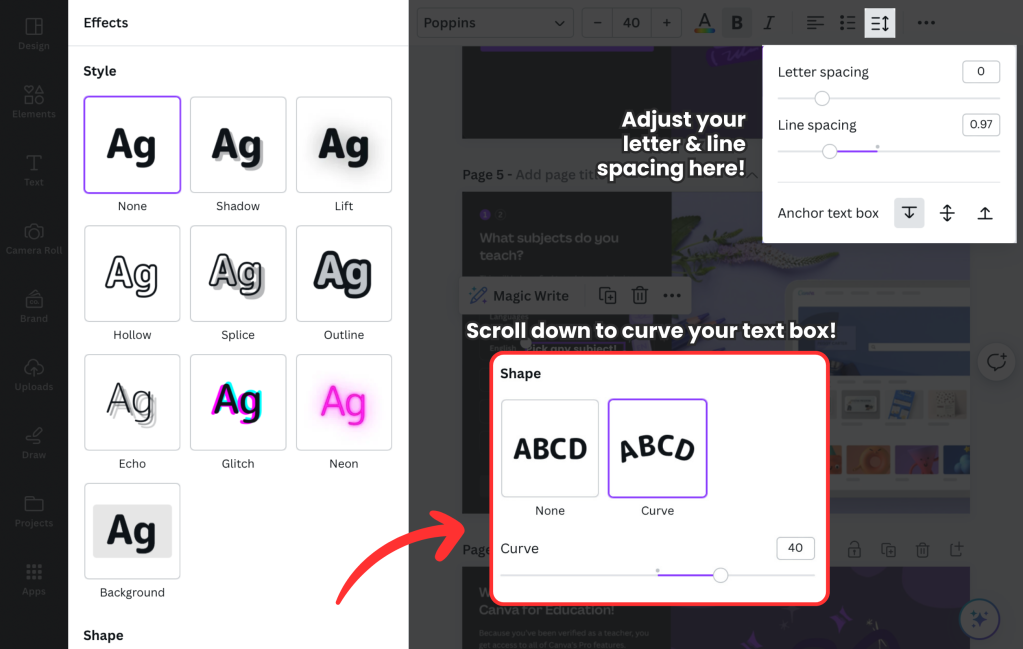
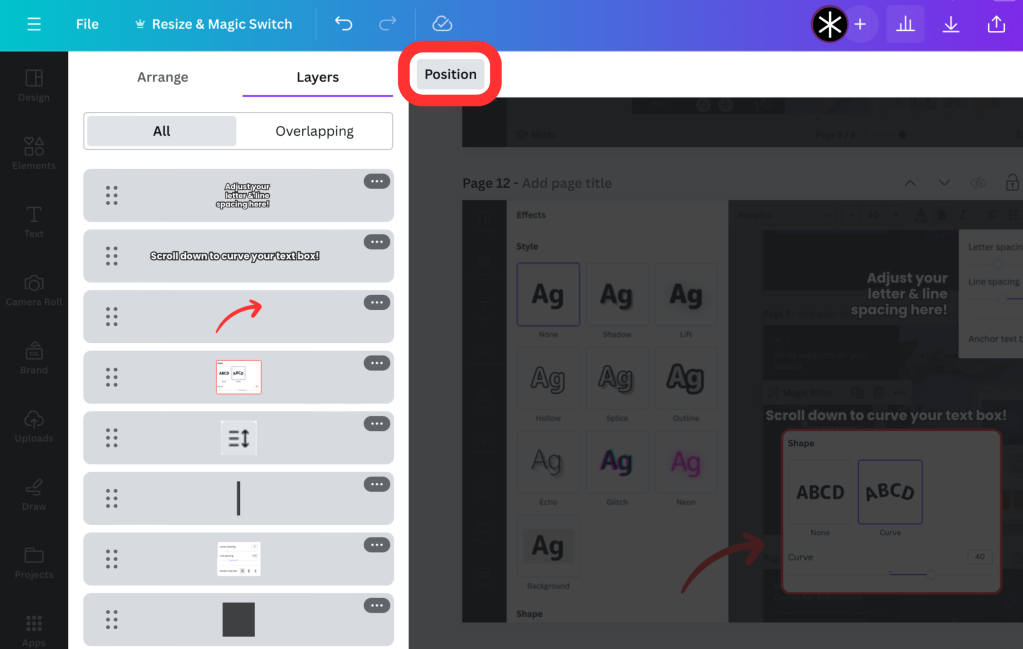
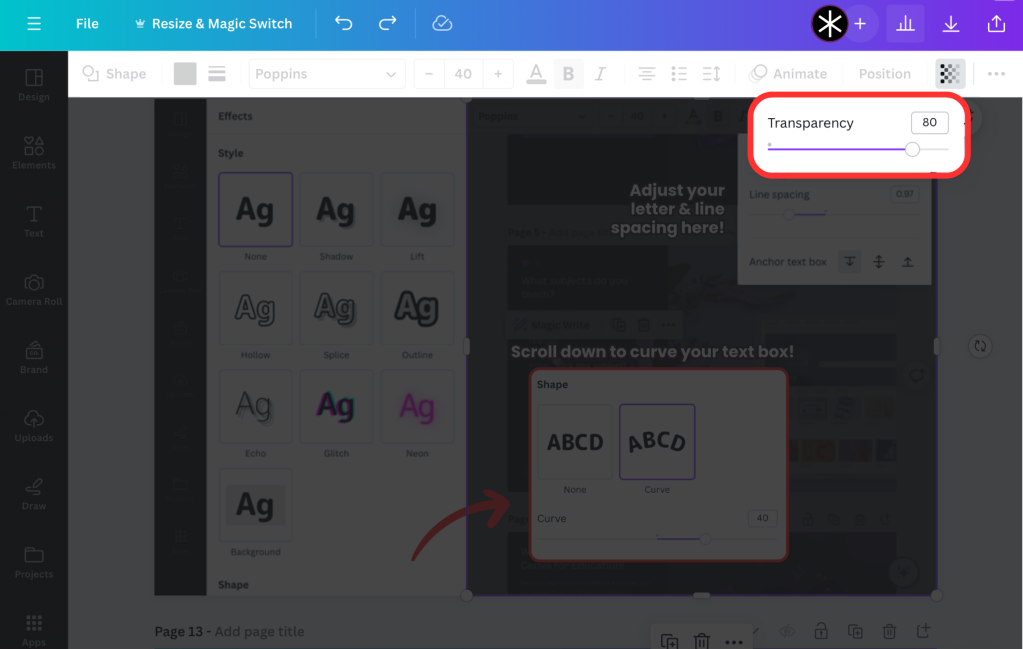
Did you know that you can adjust the spacing between letters and lines of your text? If you find the distance between lines in a text box too large, you can shorten the line spacing for more compact text! To do so, select the Spacing icon on the top toolbar.
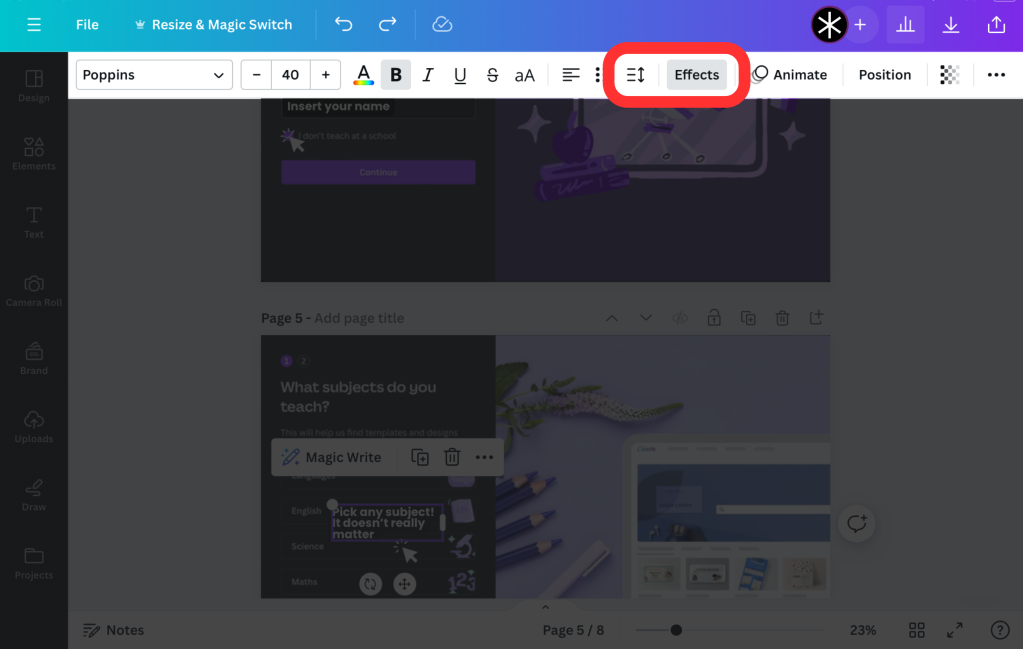
Beside the spacing icon is the “Effects'' button, where you can try out various effects on your text box. My personal favourties include lift and shadow, which allows your text to better stand out from the background. By scrolling down, you can also find options to curve your text. Simply shift the slider to adjust the direction and curvature of your text.
4. Background remover
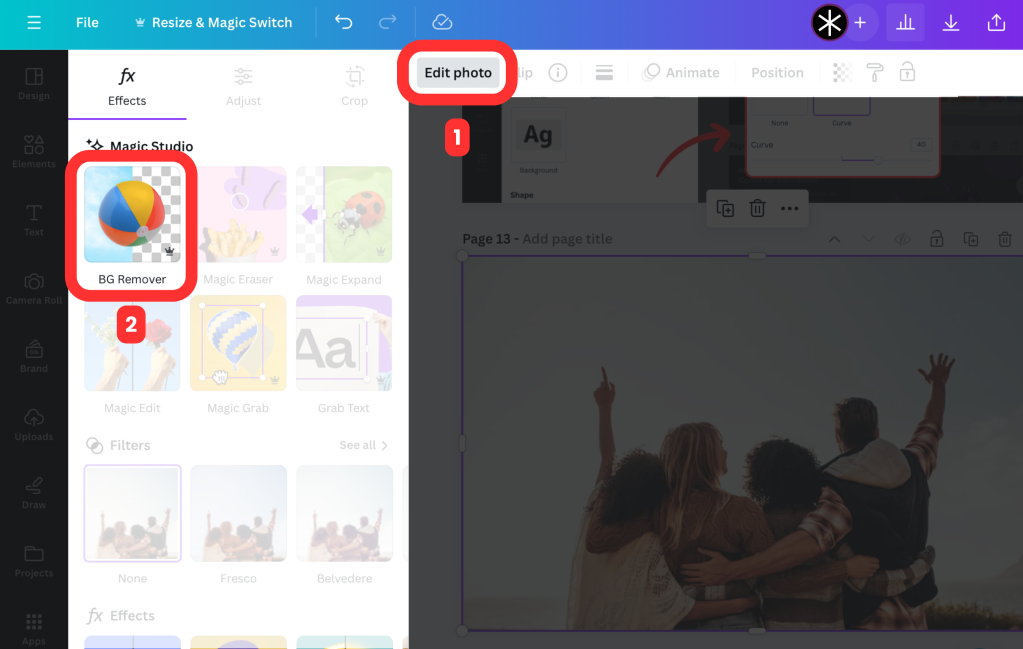
My favourite perk of Canva for Education would have to be the background remover! Although there are external sites such as https://www.remove.bg/, I find that the background remover tool in Canva produces higher resolution PNGs, and only takes a few clicks to use.
First, select the image you would like to erase the background of, then click on “Edit photo” in the top toolbar and select the tool from the pop-up on the left of your screen. Just wait for a few seconds and you should have your PNG image ready for use!
5. Position tab
This might be the most useful tool in Canva, especially if you are dealing with a design with multiple elements. When you have too many graphics on a page, it may be difficult to select something at the back, without accidentally clicking on the graphics in front of it. The Positions tab is located on the top toolbar, simply click it to view, select and shift your layers easily! To shift a layer, drag it to your desired position and let go.
6. Locking your layers
However, you can only select one layer at each time on the positions tab, which would make it difficult if you wanted to shift a few elements at once, without shifting elements in the background. A simple solution would be to “lock” these elements at the back, which can be done by clicking the image and selecting the lock icon in the top toolbar.
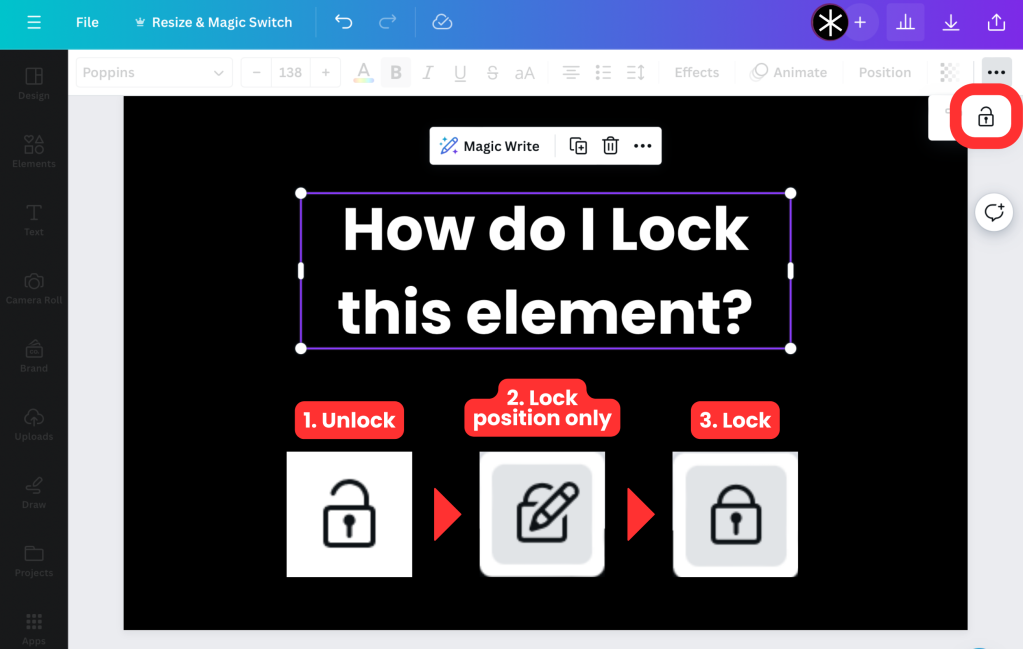
There are 3 types of “locks”:
Unlock: The default state, allowing you to move and edit the element freely
Lock position only: You can no longer move the element, but you can still edit it (E.g. If I locked a text box, I can still change the text inside it)
Lock: You cannot move or edit the element
You can change the type of lock by clicking on the lock icon!
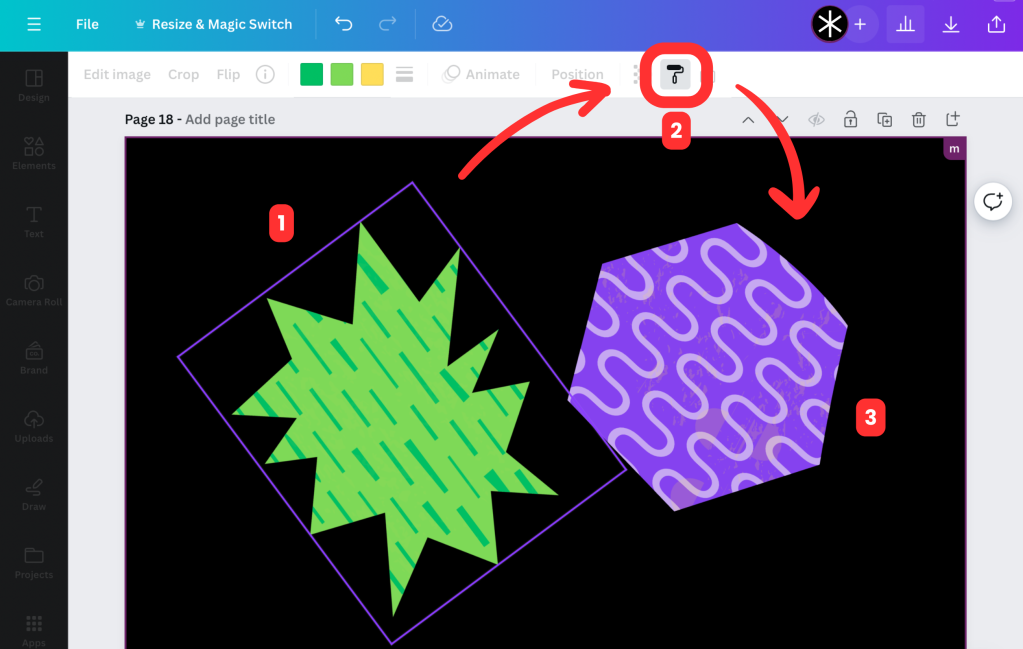
7. Copy style
Another handy tool would be the copy style tool, which you can find under the paint roller icon in the top toolbar. This tool allows you to copy and paste the colour tiles (the tiny squares in the top toolbar that allows you to change the element’s colour) of one element, to another element with just 3 clicks! First, select the element with the colours you want to “copy”, then click the paint roller icon to “load” it before selecting another element to “paste” the colour tiles on! In the example below, the purple hexagon would take on the same colour tiles as the green element after “pasting”. Do note that this tool only works if both elements have colour tiles.
8. Duotone
However, not all the elements on Canva have these colour tiles in the top toolbar for you to change its colour. Fret not, for there still is a way to still do so using the duotone tool! Click on the graphic and select “Edit Photo” in the top toolbar for a pop-up to appear. Scroll down to “Effects” and select “Duotone”.
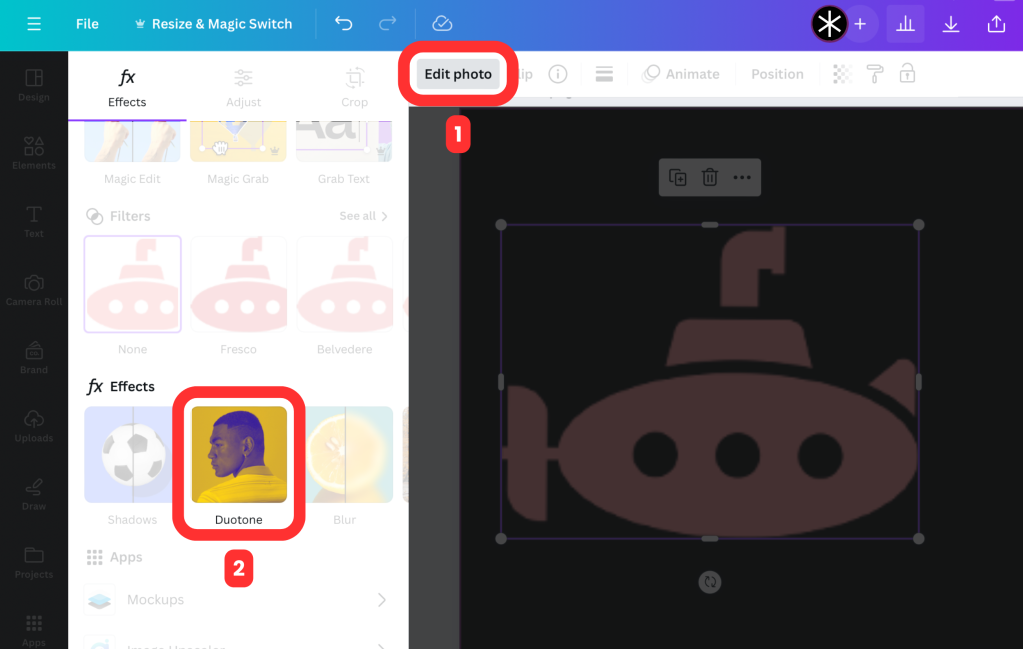
You should now see a few different colour options for your image. You can use some of the colour options given, or customise your own by clicking on the “Custom” option and adjusting the settings for highlights and shadow. To change the graphic to a certain colour, input its hex code into the highlight and shadow options.
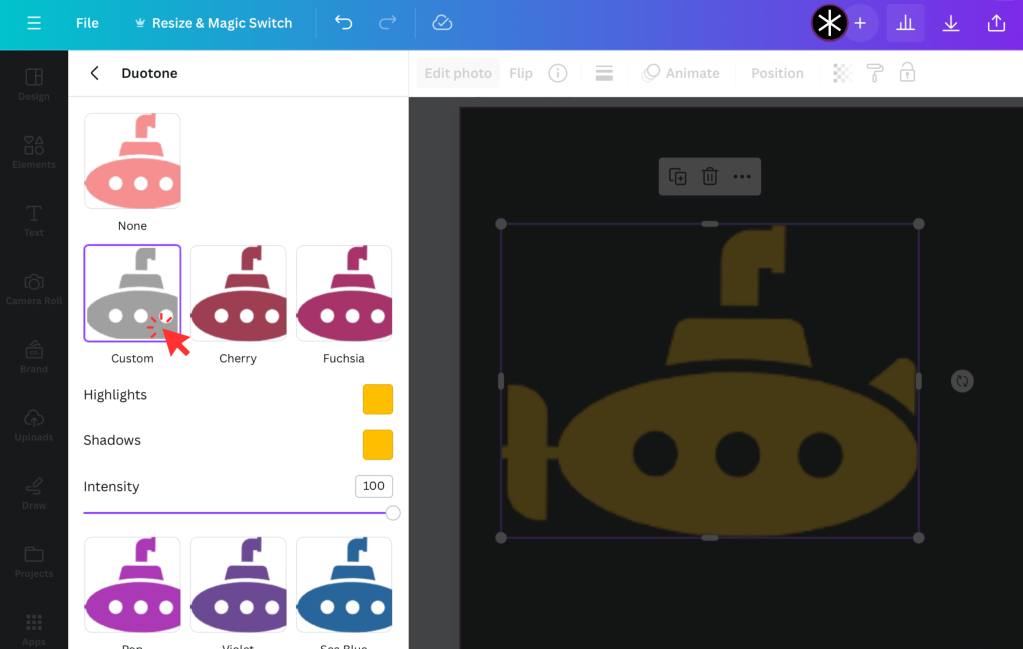
One downfall of the duotone tool is that it adjusts the colours of everything in the image. So, if you wanted parts of the image to be of different colours, I would recommend duplicating the image and cropping it so that each part would be its own individual element, and using the duotone on each element accordingly.
9. Transparency tool
The transparency tool is one that most might be aware of, but often underestimate. This tool is great in making your ‘muting’ your background and letting the more important things stand out! Even in this article, I’ve lowered the transparency of irrelevant parts of the screen to create a more obvious focus on a certain tool. To do so, I inserted a solid coloured shape over these sections and lowered its opacity by clicking on the transparency icon in the top toolbar. This tool works on textboxes, pictures and graphics as well.
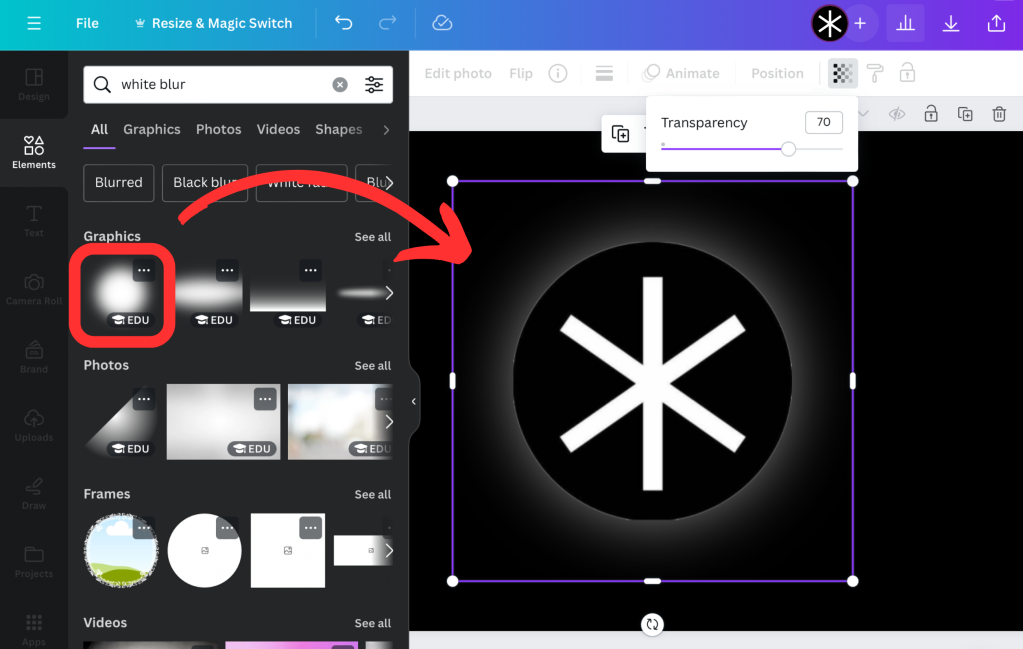
Bonus tip! If you wish to make a textbox or small element stand out with a more “faded” transparency effect, you can search for “(colour) blur” in the “Elements” tab and place it behind the element. You can even adjust the opacity of this blur with the transparency tool.
10. Instagram carousels
Recently, Instagram carousel posts have been trending on social media, and are an aesthetic and engaging way to recap an event, or share content. Instead of seeing 10 separate images, a carousel is one seamless canvas that can stretch across multiple slides.
Here are some examples of Instagram carousel posts you might have seen before:
Here’s a step-by-step guide on how to make an Instagram carousel on Canva!
1. Choose your canvas dimensions
As carousels are not a standard canvas size, select “Custom size” when creating your design. For a standard 1:1 or square frame, set the height to 1080 pixels. For a taller 4:5 frame, set the height to 1350 pixels. The width of your canvas depends on the number of “slides” you want your carousel to span across. Take the number of slides multiplied by 1080 pixels to get your canvas width.
2. Start designing!
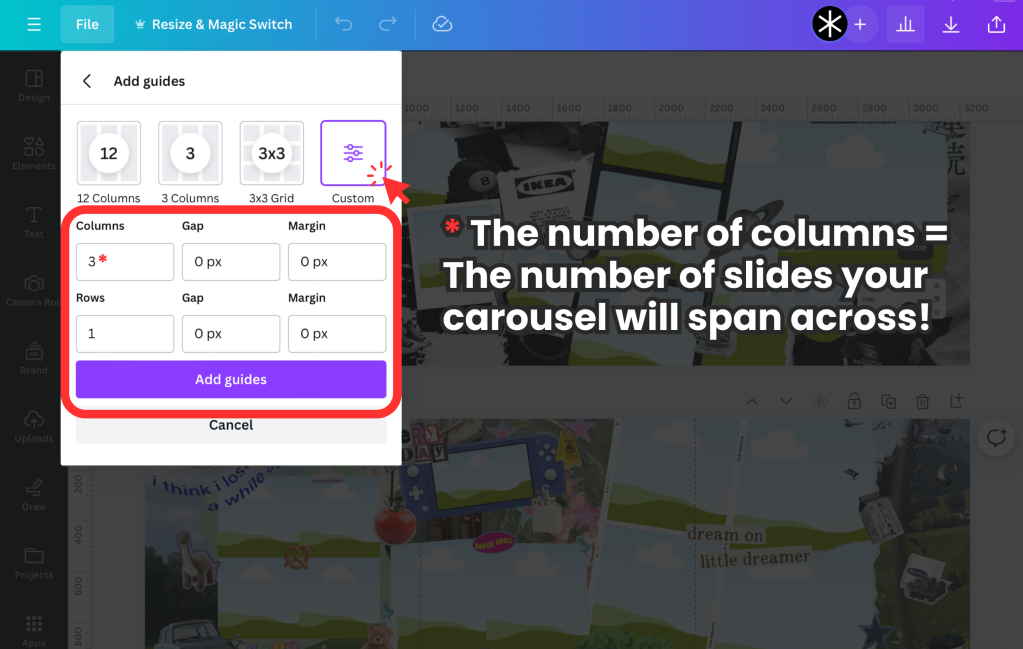
Before you start, it might be helpful to turn on Canvas guides to see where your design will be cropped for each individual slide. To do so, click on “File” in the top toolbar, then “Settings”, then “Add guides”.
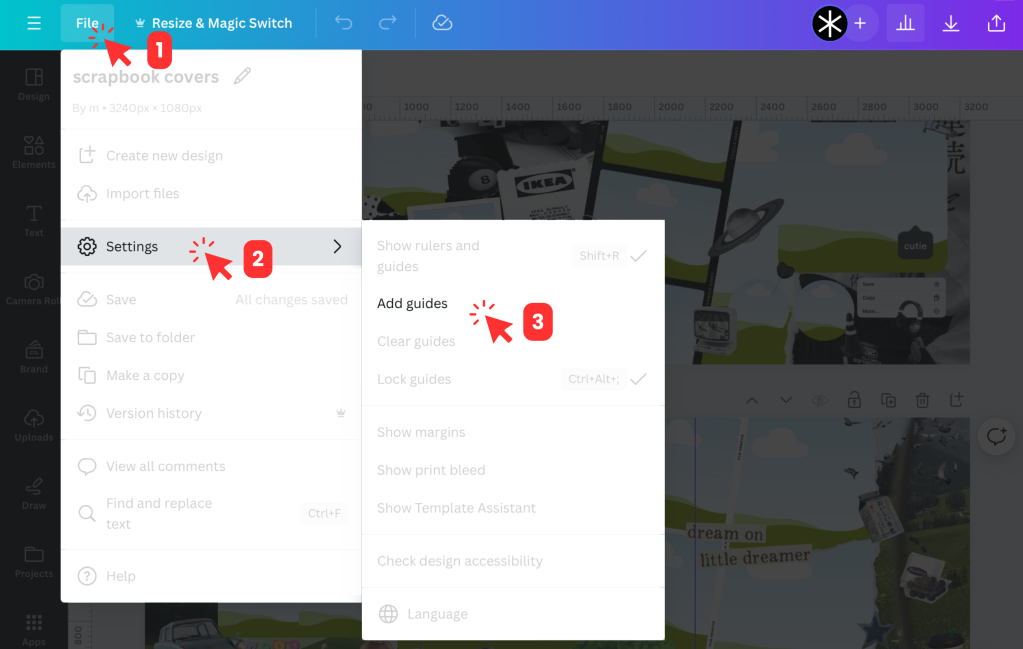
Adjust the settings under “Custom” so that all gaps and margins are 0 pixels, and “Rows” is 1. The number of columns is the number of slides your carousel will span across (or the width of your canvas divided by 1080).
Now, on to the fun part! Choose the images or videos you’d like to incorporate and arrange them on your long canvas. To decorate, you can search for elements on Canva, and use the many frames provided (which you can find under the “Elements” tab) for variety! Popular frames include polaroids, film strips and paper trims. Try playing around with curved texts, fonts and other cool tricks mentioned above!
If you’re unsure of how you can structure your carousel, you can look at other Instagram carousels for inspiration. This Telegram channel https://t.me/scrapbookcanva also provides a useful compilation of resources and ideas you can use in Canva! You can scroll through the pictures for inspiration, and if you find one you like, there is an attached link to the Canva file which you can make a copy of to edit. You may directly upload your pictures into their templates, or use the decorative elements they have in your own carousel design.
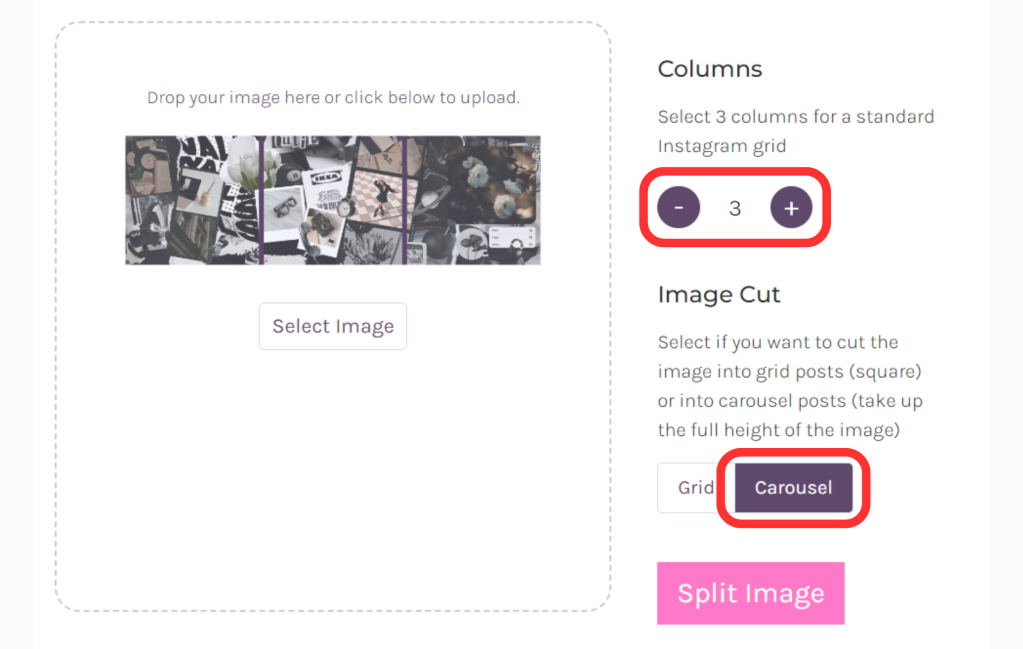
3. Crop your canvas
After you have completed and exported your carousel, it’s time to split it into individual slides for posting. To split long canvas evenly, I use an online image splitter https://mysocialboutique.co/instagram-grid-maker/. Upload your canvas and select the number of columns and carousel cut. Your carousel is now ready to be posted!
I hope that you’ve found some of these tips helpful, and will get to try them out in your next Canva project! There are many more features on Canva that were not covered in this article, so if you have the time, consider exploring Canva yourself to unlock Canva’s fullest potential.


Comments